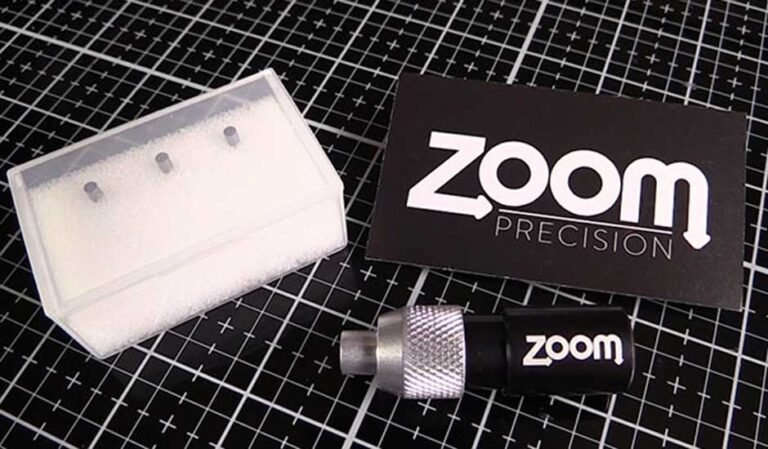
Welcome to our in-depth review of the ScanNCut Zoom Precision Engraving Tool. In this article, we will explore the features and performance of this tool, which was graciously provided to us by its creators for testing purposes. Watch the accompanying video for a visual demonstration of the tool in action.
Overview of the Zoom Precision Engraving Tool
The Zoom Precision Engraving Tool is compatible with all versions of the ScanNCut machine, although our testing was conducted exclusively on the ScanNCut 2 model. This versatile engraver is designed to work on various materials, including aluminium, copper, silver, metal clay, acrylic, plastic, glass, and leather.
Included Tips and Accessories
The engraving tool comes with three different tips: precision, regular, and blunt. During our evaluation, we primarily utilized the regular tip, as it consistently delivered satisfactory results. Additionally, the package includes aluminium blanks to experiment with, but you can also purchase additional accessories for the Zoom Precision Engraving Tool separately.
Testing and Results
To use the Zoom Precision Engraving Tool, simply replace the blade holder in your ScanNCut machine with the engraver. Initially, we used the default settings on the machine, which yielded decent but not outstanding outcomes. However, by adjusting the settings and making multiple passes, we achieved significantly improved results.
For instance, when engraving the word “MAX,” we varied the settings as follows:
- Draw Speed 1 – Draw Pressure 4 – 1 Pass
- Draw Speed 1 – Draw Pressure 4 – 2 Passes
- Draw Speed 1 – Draw Pressure 4 – 3 Passes
- Draw Speed 1 – Draw Pressure 8 – 1 Pass
- Draw Speed 1 – Draw Pressure 8 – 2 Passes
- Draw Speed 1 – Draw Pressure 8 – 3 Passes
To create a fill effect, we accessed the machine’s Settings and enabled the Fill Pattern option. We adjusted the Fill Spacing to 0.039 and the Fill Direction to 0°. While the differences may be subtle in the provided image, they are noticeable in person. Please note that the large aluminium blanks featured in the image were obtained separately from a local store.
Ultimately, we discovered a consistent set of settings that produced satisfactory results for various projects:
- Draw Speed: 1 or 2
- Draw Pressure: 9
Once we settled on these settings, we found that multiple passes were no longer necessary.
Enhancing Engraving Results
One of our favorite techniques involved utilizing an SVG file that emphasized the FILL function. Instead of creating a mere outline, the file added a fill to the design, resulting in a more striking engraving.
If you’re interested in accessing the specific SVG file we used, it can be found at LoveSVG (a website that offers free SVG files).
For optimal performance and smooth operation, we recommend keeping the following tips in mind:
- Secure the blank material firmly to the mat using double-sided adhesive.
- Align the blank with the dotted lines on the mat to ensure straight engraving.
- Utilize the Scanning option to scan the blank, facilitating precise placement of your image or text.
- Take advantage of the Zoom function in the ScanNCut machine to aid in accurate positioning.
- Always use the DRAW function when employing the Zoom Precision Engraving Tool.
Where to Purchase the Zoom Precision Engraving Tool
The Zoom Precision Engraving Tool is available for purchase on Amazon. For further information and to explore additional options.
Watch the video below for a comprehensive tutorial on using the Zoom Precision Engraving Tool.
Conclusion
In conclusion, the ScanNCut Zoom Precision Engraving Tool offers versatility and impressive results when used with the ScanNCut machine. By adjusting the settings and employing multiple passes where necessary, you can achieve intricate and eye-catching engravings on various materials. Follow our tips for optimal performance, and consider adding this tool to your creative arsenal.


